
market@chinacoalintl.com
Reinforced protective layer is a routine and mandatory inspection item in reinforced concrete structures. In a broad sense, the steel bar protection layer is the part of concrete that protects the steel bar and prevents the steel bar from being exposed directly.
Each specification has a different definition of thickness, most of which is the distance from the outer edge of the steel bar (excluding the stirrups) to the outer surface of the concrete.
In addition to the quality of raw materials, the protective layer of steel directly affects the durability of concrete structures.
As we all know, concrete is directly exposed to the air, and carbonization occurs from the surface layer to the deep layer. When the carbonized layer contacts the reinforcing steel, it will cause corrosion of the reinforcing steel.
In addition to the reduced strength and performance of rusted steel bars, expansion will occur. The volume expansion coefficient of deep rusted steel bars can be above 1.7. The expanded steel bars will cause the surrounding concrete to crack and the protective layer of concrete to fall off, which will expose the steel bars and cause further rust.
The carbonization rate of concrete is about 1mm every two years, and a sufficiently thick protective layer can effectively delay the process of carbonization depth reaching the position of the reinforcement, which is also an important basis for determining the useful life of the concrete structure in the design.
The thickness of the protective layer is too small, which is a direct hazard. In the specification, the requirement of "minimum value of the protective layer of the reinforcing bar" is also specified. In the case of stressed concrete members such as beams and columns, if the thickness of the protective layer is too large, the concrete is prone to cracking, and air and moisture contact the steel bars through the cracks, which will cause the aforementioned steel bars to rust, expand, and fall a series of questions off the protective layer.
Therefore, the thickness of the protective layer should not be too small or too large, and should be within the range allowed by the specification. Therefore, in addition to the dimensional deviation inspection during the construction process, the thickness of the protective steel layer in the structural entity should also be inspected.
The verification check of the thickness of the reinforced concrete protective layer is to strengthen the quality acceptance of the concrete structure, truly reflect the quality indicators such as the position of the reinforced steel bar, and ensure the safety of the structure.
The detection of the thickness of the protective layer of the steel bar can be detected by the broken method and the non-broken method. Generally, the non-destructive method is used to reduce the workload, and if necessary, the partial damage method is used for calibration.
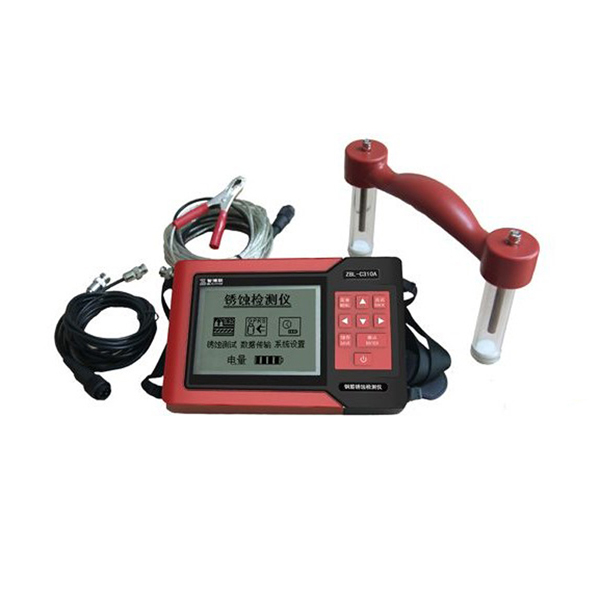
The following introduces the ZBL-R630 concrete rebar detector produced by Shandong China Coal Group.
Preparation before testing
1. Look at the drawings and design documents to understand the thickness of the protective layer, the diameter of the reinforcing bars, the spacing and distribution of the reinforcing bars, the location of the embedded parts, etc., and make a record.
2. Determining the number of random inspections: According to the relevant provisions of the steel bar protective layer thickness detection in Appendix D of "Quality Inspection Standards for Water Transportation Engineering" (JTS257-2008), at least 6 reinforced bars shall be selected for the supporting walls, gate walls, etc. for testing. Each rebar should be measured at a representative location at 2 to 3 points.
3. Inspection items before the use of concrete rebar detector—
(1) Check whether the concrete reinforcing rebar detector is within the verification period of use, and check on the standard parts to verify whether the equipment is in normal use.
(2) Check the battery level. If the battery level is extremely low, the instrument will beep 3 times, and then the empty battery icon flashes in the lower right corner of the screen. At this time, you should immediately exit the detection interface, return to the main menu interface, and shut down. Otherwise, data will be easily lost or error.
On-site testing steps
The on-site detection technology is very important, which is related to the accuracy of the detection data. Taking the # 6 left lock wall of the lock room of a ship lock expansion and reconstruction project as an example, the detection steps are as follows:
1. The surface of the component needs to be clean, flat, free of dirt and plaster.
2. According to the drawings, design documents and on-site supervisors, there are no embedded metal parts at the measuring point that affect the testing data.
3. Select the range of the rebar detector, which is divided into two ranges. The first range is used in the case where the thickness of the protective layer to be tested is small; the second range is used in the case where the thickness of the protective layer to be tested is large.
4. Rebar detector parameter settings:
(1) Component number setting;
(2) Set the diameter of the steel bar to be tested, and the steel bar diameter of this component is 25mm;
(3) Set the thickness of the design protection layer of the tested steel bar, here is 50mm;
(4) Minimum thickness setting. When the value is set to a value other than 0, if the thickness of the protective layer of the measured steel bar is less than the set value, the instrument alarms and prompts, and does not display and store the measured protective layer thickness. This time the parameter is set to 0, so the function is turned off;
(5) Data correction. The use of this function cannot completely eliminate the influence of adjacent steel bars on the test results. No numerical correction is performed for this test.
5. Rebar detector reset: In the parameter setting interface, hold the sensor in the air, away from the ferromagnet, press the "back" key to enter the test interface, the rebar detector automatically performs the sensor reset operation, and the test interface screen prompts after about 3 seconds. The current thickness is displayed as "0", resetting is completed and the measurement waiting state is entered.
6. Determine the position, direction and thickness of the protective layer. To determine the direction of the reinforcing steel bar, it is necessary to avoid the interference of unrelated steel bars. When measuring the 6 # longitudinal steel bar in the left gate wall of the lock room, the horizontal bar is scanned first, and a survey line is arranged between two adjacent horizontal bars.
Then place the probe on the concrete surface to be tested, move the sensor at a constant speed in a direction parallel to the measured steel bar. As the probe gets closer to the steel bar, the scroll bar gradually increases, the signal value increases, and the current thickness value decreases. ; The thickness of the protective layer thickness of the steel bar is automatically locked when the probe passes over the reinforcing bar. Press the “Save” key to store the measured protective layer thickness value.
Performing a reset operation every 10 minutes or so during the test can improve the test accuracy.
7. Sorting of test results. The detected data can be output through the software that comes with the instrument, or it can be manually entered into the computer. After finishing, the component measured a total of 25 points, of which 3 failed points (both positive deviations), the pass rate was 88%.
Evaluation of test results
According to "Quality Inspection Standard for Water Transport Engineering" (JTS257-2008), the positive deviation of the actual thickness of the reinforced protective layer of cast-in-situ gate walls, retaining walls and other components should not exceed 15mm, and the negative deviation should not exceed 5mm. In each sampling test result, the maximum negative deviation of the unqualified points should not be greater than 7.5mm.
The standard for determining the solid steel protective layer thickness of major components is qualified: When the passing rate of all steel protective layer thickness testing is 80% or more, the test result is qualified;
When the qualified point rate is less than 80% but not less than 70%, the sampling test should be doubled. When the qualified point rate calculated based on the sum of the two sampling quantities is 80% or more, the test result of the thickness of the steel bar protection layer should still be determined as qualified . In summary, the thickness of the 6 # steel bar protection layer on the left gate wall of the lock chamber is judged as qualified.
Conclusion
Inspection of the reinforcing steel protection layer is only one of the inspection and acceptance items of the reinforcement process. To ensure that it is within the scope of the specification, it is necessary to make corresponding work on the steel bar cutting, installation, support and reinforcement, formwork assembly, and concrete pouring. Control can be said to be a microcosm of the quality of each component process.
The reinforced protective layer rebar detector is easy to operate and easy to carry, and the number of detections of protective layer indicators during inspections has increased year by year. However, in previous inspections, there were not many projects that could pass the inspection. Therefore, choosing a rebar detector with guaranteed quality is the first step to ensure that the engineering test is qualified.

© Shandong China Coal Group. © 2017
Address: No. 11, North of Kaiyuan Road, High-tech Zone, Jining City, Shandong Province, China
sales@chinacoalintl.com
Executive Editor: Zhang Wen / Editor: Linda Zhang